|
The primary causes of running injuries are faulty alignment and the way in which force is applied to that alignment.
This ultimately results in excessive load on joint and soft-tissue structures.
The influences on alignment and loading characteristics include:
- Physical limitations
- Structure malalignment
- Joint limitations/muscular inflexibility
- Weakness
- Limited dynamic control (poor control of strength)
- Running technique
- Training program design
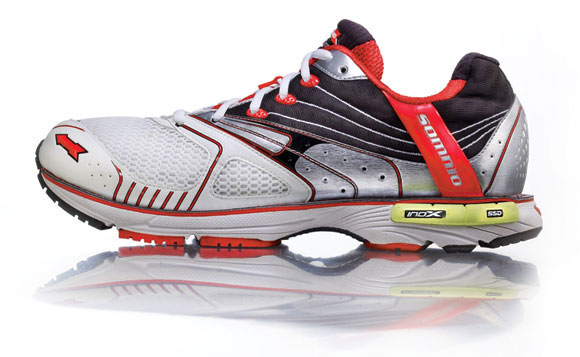
- Shoe design
Evaluation of running technique across a broad spectrum of athletes has revealed typical patterns of movement associated
with the various types of running injuries and limited performance. These patterns cause alignments and loading characteristics
that are predictable and thus allow for the development of predictable strategies to improve the gait pattern.

The most common pattern of faulty gait involves excessive STJ pronation with genu valgus/femoral internal rotation and
accounts for many of the most common running injuries.
 Illio-Tibial Band Syndrome Illio-Tibial Band Syndrome
- Patello-femoral Chondromalacia
- Hip Pain (side, post-lat, front)
- Low Back Pain
- Plantar Fasciitis
- “Shin Splints”
- Anterior Tibialis Tendinopathy
- Posterior Tibialis Tendinopathy
- Tibial Periostitis/Stress Fracture
- Compartment Syndrome
- Morton’s Neuroma
- Sesmoiditis
- Bunion
- Achilles Tendinopathy
- Metatarsal Stress Fx
- Haglund’s Deformity
Correction of the faulty gait patterns involves attention to both the active and passive components influencing the alignment.
- Active influences are addressed medically and include attention to physical limitations, running technique, and training
program design.
- Passive influences have historically been addressed through shoe design and/or medical prescription of an orthotic device.
Unfortunately, shoe design has not addressed alignment control through direct support of the foot into a more optimal
mechanical alignment.
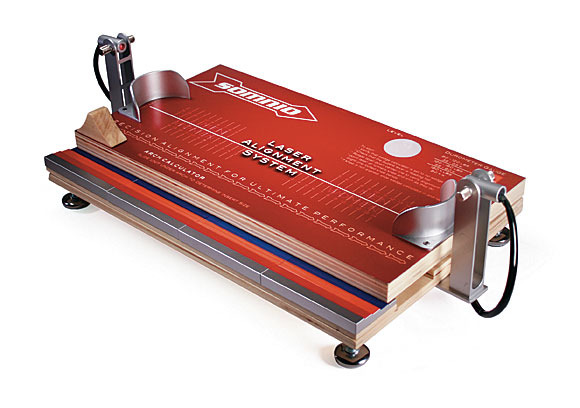
The Line Up Measuring Device is our patented fitting tool.
The biomechanic design is a result of our
partnership with the Boulder Center for Sports Medicine. The runner stands barefoot upon the Line-Up, and you use the adjustable
slides to easily determine:
- which footbed fits the runner’s arch
- which cushion is appropriate for their weight and running surface
- which Varus Wedge inserts best align the foot and lower leg
Step 1: Line-Up Device
 Standing barefoot alignment assessment: Standing barefoot alignment assessment:
- The shoe fitter measures Arch height (Low, Normal, High)
- Measuring the amount of Pronation (Neutral, Mild, Moderate, Significant) Supinators should be placed in the Runaissance
model to encourage any pronation possible
- Cushioning select based on body weight
 The runner does a single leg squat on the Line Up Measuring Device The runner does a single leg squat on the Line Up Measuring Device
- Fitter adjusts leveling of your feet on Line Up Device
- Fitter finds your level of pronation to reach alignment (neutral-mild, moderate, significant pronation)
- Runner places heel against heel cup in most comfortable fit, This allows the inherent tibial torsion of the lower leg
(degree varies between people) to place the foot naturally vs. forcing the foot straight forward and imposing an internal
rotation of the knee/femur.
- Fitter lines up laser on middle of patella
- You, the runner, perform a single leg squat (1/3 knee bend) while person looks straight forward so as not to influence
alignment results.
- You perform a few repetitions of the squat so the fitter can assess typical running patterns.
Step 2: Adjust Varus

The fitter will adjust the Varus using our patented Line-Up device.

The fitter will adjust the balance of the Line Up Device to optimize the alignment of the laser tracking on your patella.
Step 3: Use Arch Ball
 In this step the fitter will select your ideal arch height based on: In this step the fitter will select your ideal arch height based on:
- Archometer
- General visual assessment of arch height (Low, Normal, High).
- Historical tolerance of arch support (this is determined during your initial questioning).
- Right and left can be different.
Step 4: Select Components
 The fitter will use the Durometer Gauge, your general weight and the Varus setting to select your correct inserts. The fitter will use the Durometer Gauge, your general weight and the Varus setting to select your correct inserts.
Durometer will initially be based on body weight or injury needs and then be adjusted to accommodate for the intangible
“feel” that you are seeking.
- Firmer durometer in the forefoot can assist in pronation control.
- Individuals that “catapult” from outer heel to excessive pronation may benefit from 45-55 durometer in the
heel to slow the speed of transition.
Step 5: Shoe Trial
 Place the Functionally Engineered Adaptable Tricomponent [FEAT] System into the shoe. Place the Functionally Engineered Adaptable Tricomponent [FEAT] System into the shoe.
Shoe Trial
The fitter will use their skills to make specific adjustments to get the best shoe fit. Making any necessary adjustments
based on how the shoe actually fits and feels.
- Modifications:
- The shoe fitter’s first priority is addressing any alignment needs with appropriate canting changes.
- They will modify durometer of inserts to provide a good balance between comfort/feel and injury needs.
- Arch Height: This is typically a straight forward decision.
|